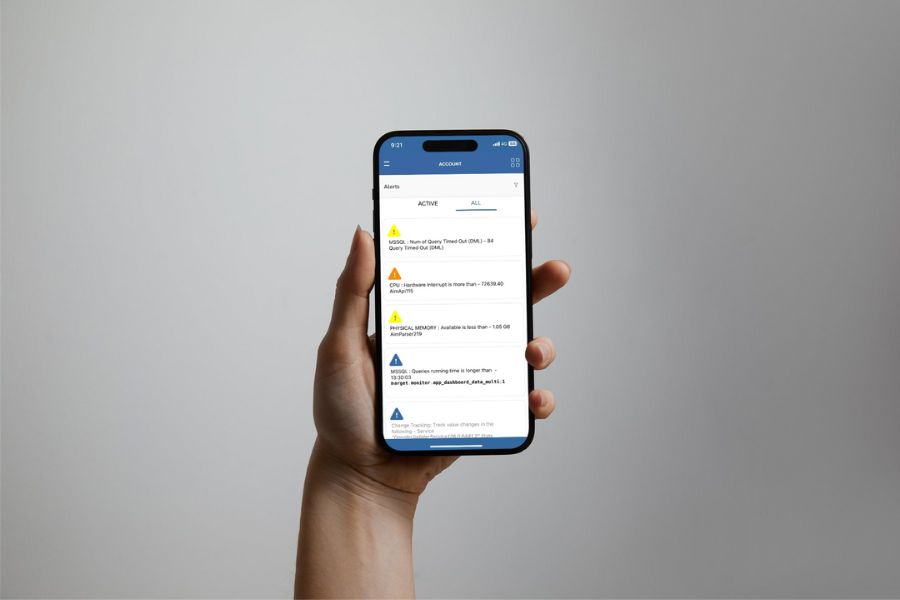
Aligned with our customers’ needs, we’ve introduced SSO authentication for logging into AimBetter in our latest version.
Single Sign-On (SSO) is an authentication method that streamlines access by allowing users to access multiple applications or services with one set of login credentials. With SSO, users log in once to access all authorized systems and resources across different platforms, reducing the hassle of managing multiple usernames and passwords. This approach enhances security by centralizing authentication, which lowers the risks associated with weak or reused passwords.
AimBetter Integration with SSO (SAML 2.0)
You can integrate AimBetter with your Identity Provider to authenticate users via SSO if it supports the SAML 2.0 protocol. Supported providers include Okta, Azure AD, Auth0, OneLogin, and others.
Configuring SSO on AimBetter
To configure SSO using SAML 2.0 on AimBetter, follow these steps:
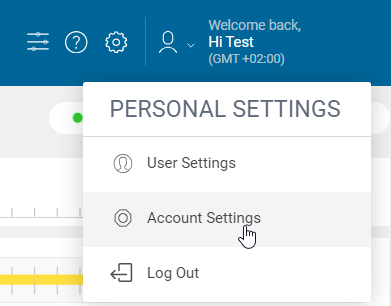
- Navigate to Account Settings under User Settings.
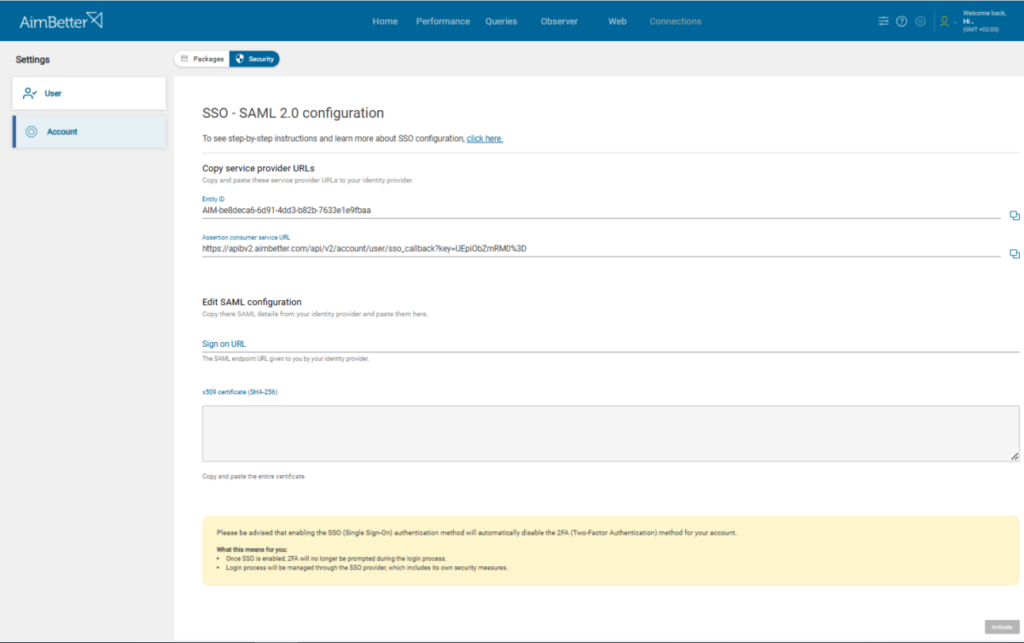
- Select the Security tab to configure SSO.
Required Service Provider (SP) Details
You’ll need to provide the following Service Provider details to your Identity Provider:
- Entity ID: This is the unique identifier for AimBetter as the application for SSO authentication.
- Assertion Consumer Service (ACS) URL: After the Identity Provider verifies the user, it sends a SAML assertion to this URL for validation.
Required Identity Provider (IdP) Details
Your Identity Provider will require these details:
- SSO URL: The endpoint where AimBetter sends authentication requests. This is sometimes called the Login URL or IdP SSO URL.
- Public X509 Certificate: This digital certificate secures the authentication exchange between the IdP and AimBetter.
Setting Up SSO on Popular Identity Providers
Okta
- Log in to the Okta dashboard.
- Go to the Applications tab and click on Add Application.
- Select Create New App.
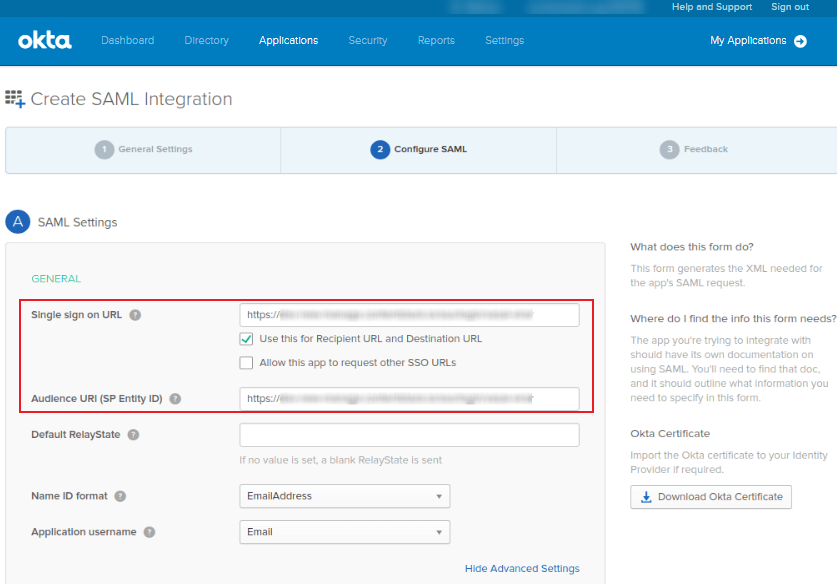
- Set the Platform to Web and Sign-on method to SAML 2.0.
- Name the application (e.g., AimBetter), and proceed to the SAML settings.
- Provide the necessary SAML settings as displayed.
Azure AD
- Log in to the Microsoft Entra Admin Center as a Cloud Application Administrator or higher.
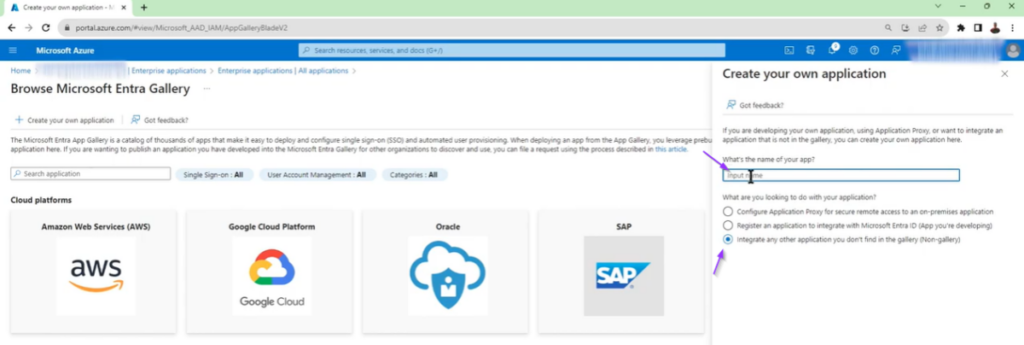
- Go to Identity > Applications > Enterprise Applications > All Applications and select New Application.
- Enter a name for the application (e.g., AimBetter) and keep Non-gallery selected.
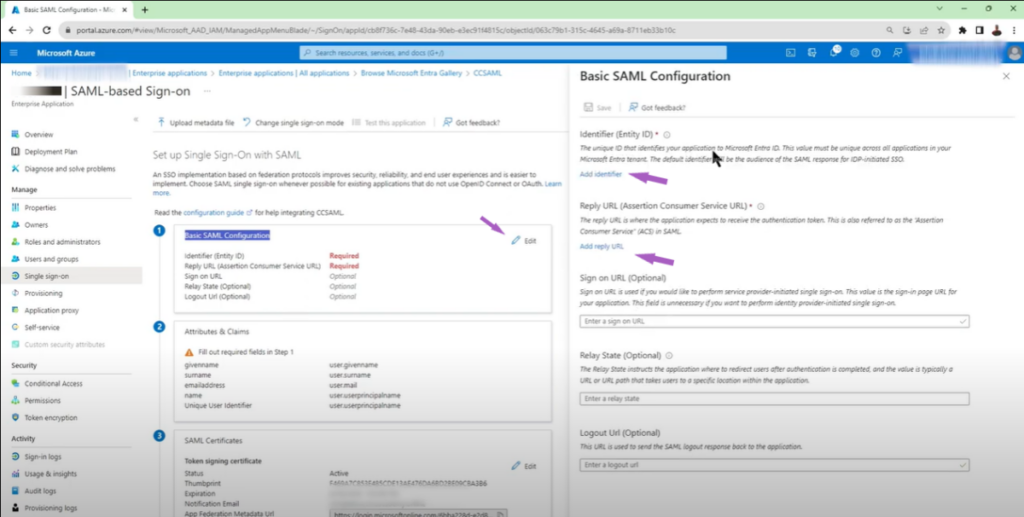
4. Select Single sign-on to open the SSO settings pane.
5. Configure the required SAML settings as shown in the configuration image.
Additional Information
- Disabling SSO: You can disable SSO login anytime by toggling it off. The configuration remains saved and can be reactivated without additional setup.
This integration simplifies user management and boosts security, providing a unified and secure access experience for AimBetter users.
